
If you want to remove ear hair from your Doodle without turning bath time into a wrestling match, the secret is patience, the right tools, and knowing exactly when to stop. Doodles inherited their curly, low-shedding coats from their Poodle parent, and that includes hair growing right inside the ear canal, which means regular upkeep isn’t optional, it’s part of keeping your dog comfortable and infection-free.
I’ve been writing about Doodle care for years now, and ear maintenance is one of the topics that trips up new pet parents the most. It looks intimidating. Dogs squirm. Owners worry they’ll hurt their pup. But once you understand the mechanics of why this hair grows where it does, the process gets a lot less scary.
Why Doodles Are Prone to Ear Hair Buildup
Most dog breeds have ear canals lined with short, protective fur or minimal hair. Doodles are different. Because of their Poodle lineage, Goldendoodles, Labradoodles, and Bernedoodles often grow dense, curly hair directly inside the ear canal itself, not just on the flap. That hair traps moisture, wax, dirt, and debris in a warm, dark space with poor airflow, which is basically a recipe for bacterial and yeast growth.
Veterinary dermatologists have long flagged hairy ear canals as a risk factor for otitis externa, the medical term for outer ear infections. The ASPCA notes that breeds with excess ear hair need more frequent grooming attention specifically because trapped moisture and wax create the perfect environment for infection-causing organisms to thrive. If you own a Doodle, you’re managing this risk your entire dog’s life, not just during puppyhood.
This is also why so many Doodle owners eventually invest in a full Goldendoodle grooming kit that includes ear care tools alongside clippers and brushes. Ear hair removal really isn’t a separate chore from the rest of your grooming routine, it’s part of the same system.
Signs Your Doodle Needs an Ear Hair Trim
Your dog will usually tell you before you notice it yourself. Watch for these signals:
- Head shaking or tilting that happens more than once or twice a day
- Scratching at one or both ears, sometimes hard enough to leave marks
- A musty or yeasty odor coming from the ear canal
- Visible hair clumps matted with wax near the opening of the canal
- Redness or warmth when you gently touch the ear flap
- Reluctance to let you touch the ears, which often means they’re already sore
If you catch buildup early, a simple ear hair removal session at home usually solves the problem. If you wait until there’s redness, discharge, or a strong smell, you’re probably looking at an infection that needs a vet visit before any hair removal happens.
Never attempt to remove ear hair from a Doodle showing signs of active infection, redness, or pain. Plucking hair from inflamed tissue can push bacteria deeper into the canal and make things considerably worse. When in doubt, get a vet’s opinion first.
Step-by-Step Painless Ear Hair Removal Method
Here’s the method I recommend to every Doodle owner who asks me about this, and it’s the same approach most groomers use.
Step 1: Warm the ear first. A warm (not hot) washcloth held against the ear flap for a minute or two relaxes the tissue and makes the hair easier to grip. It also feels pleasant to most dogs, which helps them stay calm.
Step 2: Apply ear powder. This is the part people skip and shouldn’t. Ear powder dries out the hair and gives your fingers or tool something to grip instead of sliding off slick, waxy strands. A light dusting inside the visible part of the canal makes an enormous difference.
Step 3: Pluck a few hairs at a time. Using clean fingers or blunt-tip forceps, grab a small pinch of hair (never a huge clump) and pull in one quick, confident motion in the direction the hair grows. Small pinches barely register as discomfort. Yanking out a big handful is what causes pain and makes dogs hate the process.
Step 4: Consider clipping instead of plucking for sensitive dogs. Some Doodles tolerate rounded-tip scissors trimming the visible hair better than plucking. This won’t clear hair as deep in the canal, but it reduces buildup and is far gentler for anxious or sensitive dogs.
Step 5: Watch your dog’s body language constantly. If your Doodle pulls away, whines, or tenses up repeatedly, stop. Take a break, offer a treat, and try again another day if needed. There’s no prize for finishing in one sitting.
Step 6: Finish with a dog-safe ear cleanser. Wipe out any loose hair, powder residue, or dislodged wax with a cotton ball dampened in cleanser. Never insert cotton swabs deep into the canal.
Tools and Products Worth Buying
Having the right gear on hand turns a stressful task into a quick five-minute routine. A few essentials worth keeping in your grooming drawer:
- Ear powder for grip during plucking
- Blunt-tip tweezers or forceps designed specifically for ear hair, not eyebrow tweezers
- Dog-safe ear cleanser with a gentle, non-alcohol formula
- Calming treats to reward patience during the session
- Rounded-tip grooming scissors as a gentler alternative to plucking
For dogs with hair extending well beyond the ear canal onto the flap and surrounding face, a dedicated trimmer helps keep things tidy between full grooming appointments. The Freebird Electric Head & Body Hair Shaver is a versatile option that many owners use for touch-ups around the ears and face without needing to break out a full clipper set every time.

- SMOOTH SHAVE – Experience the number one benefit of this electric razor for men: a smooth shave. This high-quality elect…
- FIVE ATTACHMENTS – The all-inclusive FlexSeries Electric Shaver for Men kit comes with 5 essential grooming attachments …
- EASY TO USE – The FlexSeries electric shavers for men are ergonomically designed for easy handling whether you’re shavin…
Once you’ve removed the ear hair, loose fur tends to drift onto furniture, car seats, and grooming table surfaces. A handheld cleanup tool like the Analan Mini Pet Hair Remover makes quick work of stray hair on upholstery after a grooming session, which is a small detail that saves a lot of lint-rolling later.

- THREE TOOTH SIZES WORK IN SEQUENCE – Tackling every stage of buildup. Our triangular remover features three sides with d…
- REUSABLE, DESIGNED TO GRIP – Made with durable, sturdy construction that holds up to repeated use. Sized to feel comfort…
- BEST FOR TEXTURED AND SEMI-FIRM SURFACES – For car interiors, rugs, carpets, car mats, stairs, pet beds, fabric seat cus…
Below is a quick comparison of the core tool categories you’ll want on hand for a painless ear hair removal routine at home.

| Tool | Best For | Skill Level | Price Tier |
|---|---|---|---|
| Ear Powder | Improving grip before plucking | Beginner | $ |
| Blunt-Tip Forceps | Precise, controlled ear hair plucking | Intermediate | $$ |
| Rounded-Tip Scissors | Gentle trimming for sensitive dogs | Beginner | $$ |
| Electric Trimmer/Shaver | Touch-ups around ear flap and face | Intermediate | $$$ |
| Dog-Safe Ear Cleanser | Post-removal cleanup and infection prevention | Beginner | $ |
If your Doodle also needs a broader coat refresh while you’re focused on grooming, it’s worth comparing your options for a cordless dog clippers setup, since ear maintenance is usually just one piece of a larger seasonal grooming plan, especially heading into warmer months.
When to Let a Professional Handle Ear Hair Removal
Home ear hair removal works well for routine maintenance, but there are times when a groomer or vet should take over. The American Kennel Club recommends professional plucking for dogs with chronic ear infections, heavy wax buildup, or ear canals so narrow that visibility is limited, since improper technique in these cases can cause micro-tears in the delicate skin lining the canal.
Signs it’s time to call in a professional include:
- Recurring ear infections despite regular home care
- Thick, dark wax that doesn’t clear with routine cleaning
- A dog that becomes aggressive or extremely fearful during ear handling
- Visible swelling, discharge, or bleeding
- Hair so matted it’s fused to the skin
Groomers who specialize in Doodles typically remove ear hair as part of a standard grooming appointment, often paired with a coat style like the Teddy Bear cut that many owners request for its manageable upkeep. If your dog’s ears are complicated by chronic issues, that regular professional visit is worth the investment even if you handle basic trims yourself between appointments.
For quick styling touches around the ears that don’t involve any actual hair removal, some owners like to keep grooming sessions lighthearted with accessories such as these Cute Cat Ears Hair Clips, which can help keep long facial hair out of the way while you work, and double as a fun distraction for anxious pups during grooming.
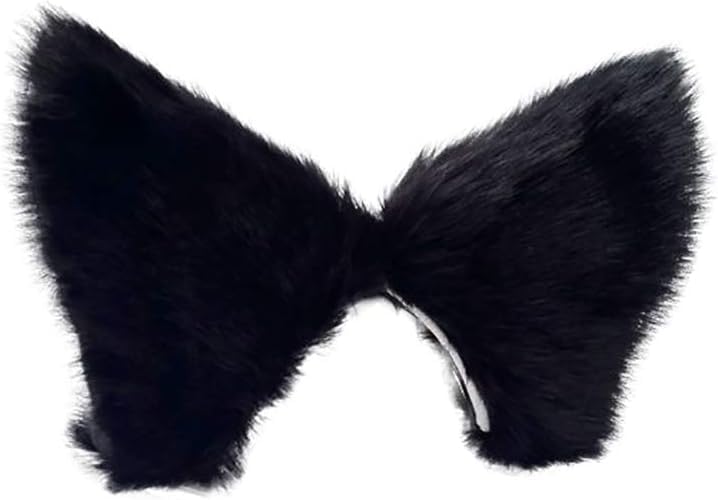
- MATERIAL QUALITY: Premium quality faux fur cat ears with , texture for realistic appearance and comfortable wear
- DESIGN FEATURES: Sturdy metal hair clips with secure grip, preventing slipping during wear while maintaining hairstyle i…
- VERSATILE USE: Perfect for Halloween costumes, cosplay events, themed parties, or adding a playful touch to everyday out…
Building Ear Hair Removal Into Your Regular Routine
The dogs who tolerate ear hair removal best are the ones who grow up with it as a normal, low-stress part of life. Start young if you can, keep sessions short, and always pair the process with something positive like a favorite treat or gentle praise. Consistency matters more than perfection here.
A good rule of thumb is checking your Doodle’s ears weekly and doing a full ear hair removal session every two to four weeks, depending on how quickly hair grows back and how much wax and debris tends to accumulate. Dogs that swim often or spend a lot of time outdoors may need more frequent attention since moisture speeds up bacterial growth in that hair-lined canal.
Remember that the goal of ear hair removal isn’t a pristine, hairless canal every single time. It’s about keeping airflow open and moisture from getting trapped so infections don’t have a chance to take hold. A little residual hair isn’t a failure, it just means you’re due for another session soon.
Frequently Asked Questions
Is it painful to remove ear hair from a Doodle?
Done correctly, ear hair removal shouldn’t cause significant pain. Plucking small pinches of hair with ear powder for grip feels similar to a quick tug rather than a sharp pain. Yanking large clumps at once, or plucking from an already inflamed ear, is what causes discomfort and should be avoided.
How often should I remove ear hair from my Doodle?
Most Doodles benefit from an ear hair removal session every two to four weeks, though this varies based on individual hair growth rate, activity level, and how much moisture the ears are exposed to. Weekly ear checks help you catch buildup early before it becomes a bigger job.
Should I pluck or clip my Doodle’s ear hair?
Plucking reaches hair deeper in the canal and tends to last longer between sessions, but clipping with rounded-tip scissors is gentler and better suited for sensitive or anxious dogs. Many owners use a combination, clipping visible hair regularly and plucking only occasionally when needed.
Can I use human tweezers to remove ear hair from my dog?
It’s best to use blunt-tip forceps designed for pet ear hair rather than pointed human tweezers, which carry a higher risk of accidentally poking sensitive canal tissue. Blunt tips are safer for grabbing hair without any risk of injury if your dog moves suddenly.